Chocolate? Hazelnuts? No flour? Yes please! This flourless chocolate hazelnut brownie recipe is based on one from Jacques Pepin’s Fast Food My Way cookbook. It’s gluten-free, since there’s no flour (that also makes it good for Passover next year!) and is rich, delicious, and easy to make. The only non-standard pantry ingredient is the hazelnuts. But I happened to have some (from a big jar of mixed nuts), so no worries there. And you don’t have to skin them either. Think of it as a Nutella brownie you made yourself. And no odd ingredients. It probably should be called heavenly chocolate brownie. You end up with something that’s part cake, part brownie, and exceptionally intense chocolate flavor.
Note, Jacques prepared this in a tart pan, lined with foil, and then buttered. I don’t have a tart pan, so I used a baking dish. Since I also dislike using foil, I buttered and floured the baking dish, and then cut the brownies in squares instead of wedges. Came out perfectly.
I strongly recommend you use a ziploc or similar sealable bag to smash the nuts. And zip it closed. Otherwise, they go flying. Ask me how I know.
He also added a whipped cream Grand Marnier garnish (which is likely also delicious, but I had none of those ingredients handy). So I settled for some vanilla ice cream instead. I don’t think I suffered much.
Flourless Chocolate Hazelnut Brownie


Ingredients
- 2 1/2 T unsalted butter
- 1/3 C semisweet (or bittersweet) chocolate or chips
- 1/4 cup shelled hazelnuts
- 1/4 cup light brown sugar
- 1/4 cup granulated sugar
- 1 large egg
- 1/2 tsp vanilla extract
Instructions
- Heat oven to 350. Butter and flour a 6 inch baking pan. Break up the chocolate and add to a glass bowl. Then add the butter. Microwave for 1 minute on high, then let it sit for 5 minutes. If necessary, heat again for 1 minute. Remove and stir until it's all melted.
- Pour the hazelnuts onto a cookie sheet and toast in the oven for 5 minutes. Let them cool, put them in a sealable plastic bag, close it, and then smash the nuts into tiny pieces with a heavy pot or a rolling pin.
- Add the sugars, eggs, and vanilla to a small bowl and whisk until smooth. Add the nuts and the chocolate and fold them into the mixture with a rubber spatula until its all incorporated. Pour it all into the brownie pan. Bake for 20 minutes.
Flourless Chocolate Hazelnut Brownie Substitutions and Variations
- don’t have hazelnuts? use walnuts or pecans instead (plus they are easier to chop up)
- top with whipped cream
- fold Grand Marnier and orange zest into your whipped cream (1/2 tsp each)
- go all out and drizzle some chocolate syrup over the ice cream
More Chocolate Dessert Recipes

So easy, a kid can do it (and I did). You don’t need a double boiler, or to separate eggs, or anything else complicated. Just heat some water (that’s the hardest part) and mix everything together.
Small Batch Brownies with Cocoa Powder
Soft, chewy brownies that only require one bowl and one pan. No fancy ingredients required here either. You also don’t have to stand over the stove melting chocolate (and cleaning extra pots).

I should probably call this triple chocolate cake. It has cocoa, chocolate, and then a chocolate ganache icing on top. But the yogurt totally makes it healthy. Right?
Single Serving Double Dark Chocolate Pudding Recipe
This is really two recipes in one. Cook on lower heat and you get European hot chocolate, leave it on the stove a bit more, and it’s pudding! Either way, it’s delicious.


 We’ve all likely had an oven that turned out to be too hot. Or too cold. But, until recently, I had no idea that you could recalibrate your oven settings that so it was just right.


 One Pot Polish Sausage and Cabbage with Potatoes
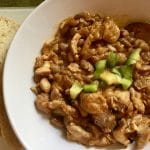 Brazilian Chicken Paprika Stew
 Quick Creole Cabbage and Sausage
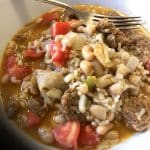
 Lentil Bean Sausage Soup


 Chili Citrus Avocado Chicken Salad
 Strawberry Banana Yogurt Popsicles

 One Ingredient Juice Popsicles